Recipes

Couscous with Herbs and Lemon

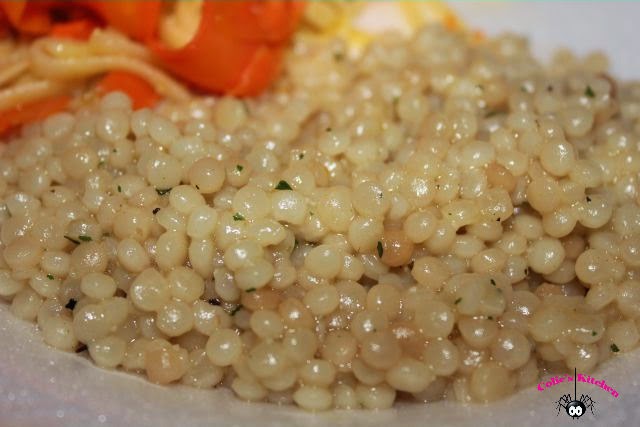
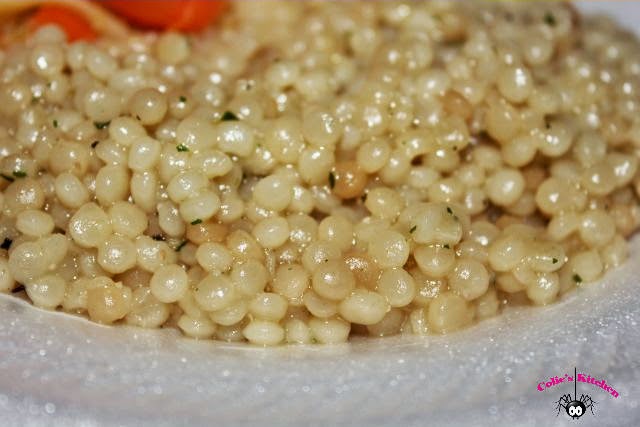
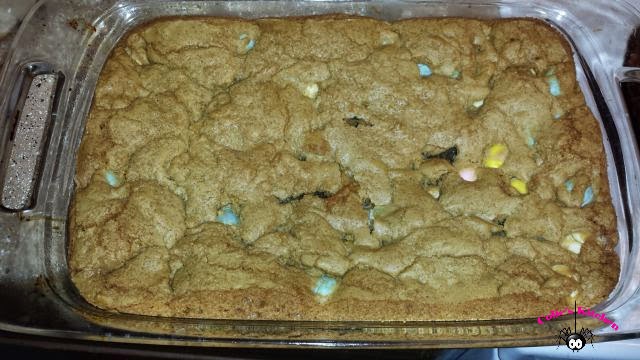
This is a really great recipe. It’s full of flavor and extra delicious. It’s a recipe that can be served as a side dish with just about anything. 

This recipe would also make a great main dish if you were to add some leftover meat or even keep it vegetarian and add some spinach or other vegetables like roasted squash, carrots, or zucchini. You can really do a lot of things with this recipe but I really love it as a side dish.
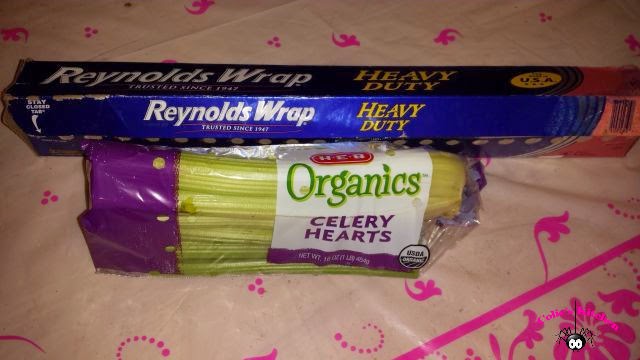

Ingredients:
  • 1 medium onion, finely chopped
  • 2 tablespoons extra-virgin olive oil
  • 2 garlic medium cloves, minced
  • 3/4 cup water
  • 1 1/4 cups low-sodium chicken broth (10 fl oz)
  • 1 (10-oz) box couscous (1 1/2 cups)
  • 1/2 cup finely chopped fresh parsley
  • 1/2 cup finely chopped fresh basil
  • 1 tablespoon fresh lemon juice, or to taste

Instructions:

  1. Cook onion in 1 tablespoon oil in a heavy saucepan over medium heat, stirring occasionally, until golden, about 3 minutes. 
  2. Add garlic and cook, stirring, 30 seconds. 
  3. Add water and broth and bring to a boil.
  4. Stir in couscous, then cover and remove from heat. 
  5. Stir in herbs, lemon juice, remaining tablespoon oil, and salt and pepper to taste.
  6. Let couscous stand, covered, 5 minutes, then fluff with a fork and

Original Recipe Source

var pfHeaderImgUrl = ”;var pfHeaderTagline = ”;var pfdisableClickToDel = 0;var pfHideImages = 0;var pfDisablePDF = 0;var pfDisableEmail = 0;var pfDisablePrint = 0;var pfCustomCSS = ”;var pfBtVersion=’1′;(function(){var js, pf;pf = document.createElement(‘script’);pf.type = ‘text/javascript’;if(‘https:’ == document.location.protocol){js=’https://pf-cdn.printfriendly.com/ssl/main.js’}else{js=’http://cdn.printfriendly.com/printfriendly.js’}pf.src=js;document.getElementsByTagName(‘head’)[0].appendChild(pf)})();Print Friendly and PDF
Check Out Our Online Recipe Book: www.CafeChatterbox.com

Recipes

Crustless Pot Pie Over Biscuits

This is a quick and easy way to have pot pie but without all the work. This is a pretty good recipe and I must admit that I appreciated the can of diced potatoes because when I am in a hurry I hate to peel potatoes.

This recipe came together pretty fast but it seemed like I had to keep adding broth to the pot the longer it cooked so keep an eye out so that your filling doesn’t get too thick.


Ingredients:
  • 1 can diced potatoes
  • 1-1/2 cups frozen diced carrots, peas, corn
  • 1 pound boneless chicken (breast or thighs)
  • 2 celery ribs diced
  • 1 medium onion (or 2 tbsp. dry onion flakes)
  • 2 cloves garlic minced
  • 2-4 cup chicken stock
  • 4 tablespoons butter
  • 2 tablespoon olive oil
  • 1/3 cup all-purpose flour
  • 1 cup milk
  • ½ teaspoon thyme
  • ½ teaspoon salt
  • ½ teaspoon ground black pepper

Directions:

  1. Over medium heat add butter and olive oil to a dutch oven. Cook until melted and well combined. 
  2. Add diced chicken and cook until chicken cooked through, then remove chicken but leave in drippings. 
  3. Add in garlic, onion, celery, and cook until the vegetables are tender. Whisk in the flour and cook until lightly browned, you will want to continuously whisk as not to burn. 
  4. Gradually whisk in chicken broth, milk and thyme, salt, and pepper. Continue whisking until your sauce has thickened up, Stir in chicken and remaining vegetables. 
  5. You may have to keep adding more stock to the pot until you come up with the right consistency.
  6. At this point you will want to add you premade (canned) biscuits to the oven. Follow can directions.
  7. Cook until pot pie mixture until all vegetables are tender.
  8. Remove biscuits from the oven and pull each one apart. Plate biscuits then pour a generous amount of pot pie filling over biscuits.

Print Friendly and PDF
Check Out Our Online Recipe Book: www.CafeChatterbox.com

Recipes

*Kitchen TIP* Wilted Stink Celery? No Thanks! Keep your Celery Fresh for Week!

Don’t you hate it when you open the vegetable crisper in your refrigerator only to find, limp, faded and sad looking celery? Suddenly adding celery to your salad doesn’t sound so appealing!

Keeping your celery super fresh and crispy for weeks is as easy as wrapping it up in tin foil. Who knew right? I have been doing this for months and I must say that it truly is the greatest tip I have ever found. Who wants to pay money for something that doesn’t last long enough to use it all?

Do NOT wash the celery, simply remove the plastic wrapping your celery comes in, then proceed to take a generous piece of tin foil and wrap the celery up in it tightly. Each time you use the celery re-wrap it back in the same tin foil. Your celery will last for many more weeks than it conventionally has, and it will look just as great and remain as crisp.

You will want to do this as soon as you get home from the grocery store to help slow down the aging process as soon as possible. This is quick, easy, and painless what more could you ask for? Give it a try! I would love to hear how it works for you!

Enjoy!

var pfHeaderImgUrl = ”;var pfHeaderTagline = ”;var pfdisableClickToDel = 0;var pfHideImages = 0;var pfDisablePDF = 0;var pfDisableEmail = 0;var pfDisablePrint = 0;var pfCustomCSS = ”;var pfBtVersion=’1′;(function(){var js, pf;pf = document.createElement(‘script’);pf.type = ‘text/javascript’;if(‘https:’ == document.location.protocol){js=’https://pf-cdn.printfriendly.com/ssl/main.js’}else{js=’http://cdn.printfriendly.com/printfriendly.js’}pf.src=js;document.getElementsByTagName(‘head’)[0].appendChild(pf)})();Print Friendly and PDF
Check Out Our Online Recipe Book: www.CafeChatterbox.com

Recipes

Cadbury Mini Egg Blondies

This is a wonderful recipe but let me caution you about a few things. Like I said before, these are wonderful, but they are super rich. The original recipe suggests 2 cups of Cadbury eggs which to me was way over the top. I personally think that 1 cup is plenty. I like sweet but that is just painfully sweet.

This recipe also suggest an 8×8 pan or a 9×9 pan. I personally found this makes the brownies too thick. If you are looking for large cake brownies then those would be great pans but next time I would try something bigger like a 9×13 pan.
The dough is very hard to spread so don’t be surprised by that, and be sure to watch your baking time. Mine were so thick in a 9×9 pan that they took forever to cook, then when they were finally cooked they were terribly dried out.

I think this recipe is great but I also think it could use a lot of adapting to make it just right. Personally if you were in a hurry you could get a nice boxed brownie mix and follow the instructions and just add the Cadbury Eggs. Although not homemade it would be much easier and probably just as good!


Ingredients:
  • 2 cups all-purpose flour
  • 1/2 teaspoon baking soda
  • 1/2 teaspoon salt
  • 3/4 cup unsalted butter, melted
  • 1 cup packed brown sugar
  • 1/2 cup white sugar
  • 1 tablespoon vanilla extract
  • 1 egg
  • 1 egg yolk
  • 2 cups milk chocolate mini eggs

Directions:

  1. In a medium sizes mixing bowl sift flower, baking soda and salt together.
  2. Melt butter over medium heat. Once melted add to the bowl of your electric mixer. Cream together with sugars.
  3. Add in vanilla and eggs mix until creamy.
  4. Slowly add in flour mixture until it is incorporated.
  5. Fold in Mini Eggs.
  6. Spread batter into a greased 9×13 baking dish. Bake at 325 for about 40 minutes or until a tooth pick is inserted in the center and comes out clean.
  7. Let the bars cool for 30 minutes before slicing.

Original Recipe Source

var pfHeaderImgUrl = ”;var pfHeaderTagline = ”;var pfdisableClickToDel = 0;var pfHideImages = 0;var pfDisablePDF = 0;var pfDisableEmail = 0;var pfDisablePrint = 0;var pfCustomCSS = ”;var pfBtVersion=’1′;(function(){var js, pf;pf = document.createElement(‘script’);pf.type = ‘text/javascript’;if(‘https:’ == document.location.protocol){js=’https://pf-cdn.printfriendly.com/ssl/main.js’}else{js=’http://cdn.printfriendly.com/printfriendly.js’}pf.src=js;document.getElementsByTagName(‘head’)[0].appendChild(pf)})();Print Friendly and PDF
Check Out Our Online Recipe Book: www.CafeChatterbox.com

Recipes

Zesty Bean Dip ("Like" Frito Lay) 52 calories a serving!

This recipe is very much “Like” Frito Lay Bean Dip if I didn’t know better I would swear it was the exact recipe. The only difference I see is that this dip is smoother whereas the Lay’s dip is much thicker and harder to dip.

I love this recipe! It’s simply fantastic. I decided I would take my dip to the true bean dip critic … my Mom! Her favorite bean dip is Frito Lay Bean Dip she would tell you there is nothing better… until she tried this one. She loved it! She was so excited at even the idea of making this herself and might I add for just a fraction of the price and guess what! You know what’s in this dip and you get A LOT more than you do in a small can!!

The second biggest selling point for me on this dip (besides it’s awesome) is the fact that this recipe cost me less than $1 yes less than a dollar! I bought store brand refried beans then added the few extra things.
Dirty cheap, easy, and fantastic! I am sold and so was the queen of bean dip my Mom!


Ingredients:
  • 1 (15 ounce) can refried beans
  • 5 slices bottled jalapenos (nacho slices)
  • 1 tablespoon brine, from bottled jalapeno slices
  • 1/2 teaspoon salt
  • 1/2 teaspoon granulated sugar
  • 1/4 teaspoon onion powder
  • 1/4 teaspoon paprika
  • 1/8 teaspoon garlic powder
  • 1/8 teaspoon cayenne pepper

Directions:

  1. Combine refried beans with the other ingredients in a food processor. (I threw everything into a Kitcheaid bowl and let the mixer do all the work.)
  2. Puree ingredients on high speed until smooth.
  3. Cover and chill for at least an hour before serving.

Original Recipe Source

Number of Servings: 8 (1/4 cup per serving)
Nutritional Information:
  • 52 calories per serving
  • 9 carbs 
  • 1 grams of fat 
  • 3 protein
  • 1 sugar

*Nutritional information found on www.myfitnesspal.com this information will vary based on the products you use.*

var pfHeaderImgUrl = ”;var pfHeaderTagline = ”;var pfdisableClickToDel = 0;var pfHideImages = 0;var pfDisablePDF = 0;var pfDisableEmail = 0;var pfDisablePrint = 0;var pfCustomCSS = ”;var pfBtVersion=’1′;(function(){var js, pf;pf = document.createElement(‘script’);pf.type = ‘text/javascript’;if(‘https:’ == document.location.protocol){js=’https://pf-cdn.printfriendly.com/ssl/main.js’}else{js=’http://cdn.printfriendly.com/printfriendly.js’}pf.src=js;document.getElementsByTagName(‘head’)[0].appendChild(pf)})();Print Friendly and PDF
Check Out Our Online Recipe Book: www.CafeChatterbox.com