Recipes

Cheater Korean Beef


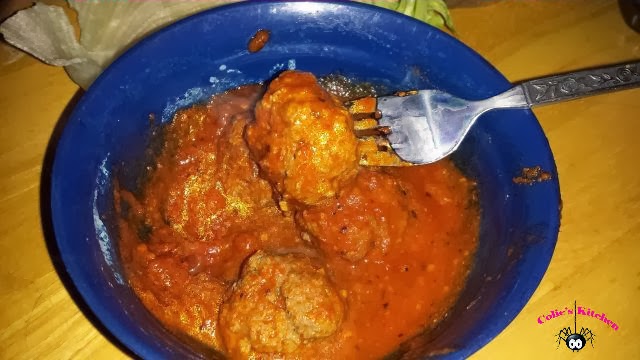
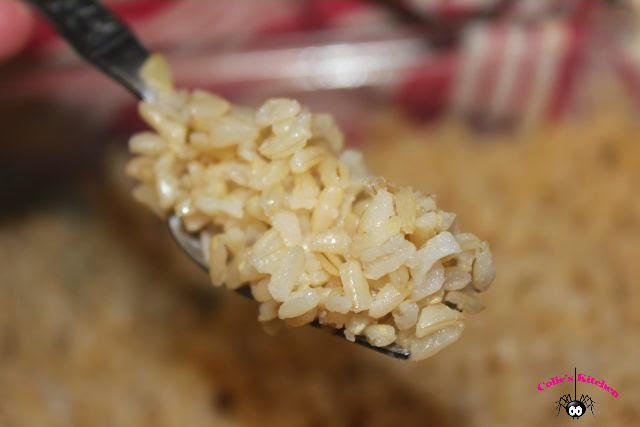
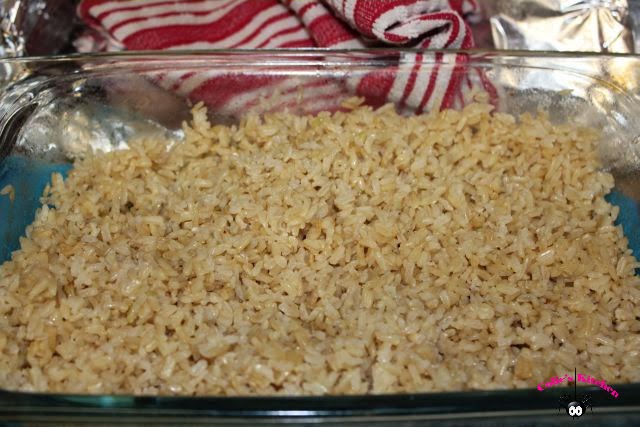
This recipe is fantastic I mean really fantastic! I had it ready in just minutes! While the ground beef was browning I was mixing up the sauce and while the entire thing was cooking together I was heating up the rice. I made the brown rice the day before to save on time meaning dinner came together fast! I combine this dish with a large bowl of Asian Ramen for a wonderful and filling dinner.


There are so many things to love about this recipe but the speed and cost are high on my list of reasons to love it.  The flavor is wonderful too! Simply wonderful!


The only thing negative I can say about this recipe is that it just doesn’t go far enough. For our family it fell a little short I might made another half recipe next time. Also, I might even use cabbage in place of rice to lower the calories. Now that sounds delicious! 


Ingredients:

  • 1/4 cup brown sugar
  • 1/2 cup soy sauce
  • 1-1/2 tablespoon sesame oil
  • ¼+ teaspoon crushed red-pepper flakes, or more to taste
  • 1/2 teaspoon ground ginger
  • 1-1/2 tablespoon vegetable oil
  • 4 small cloves garlic, minced
  • 1 pound ground beef (90/10 or better)
  • 4 green onions, thinly sliced
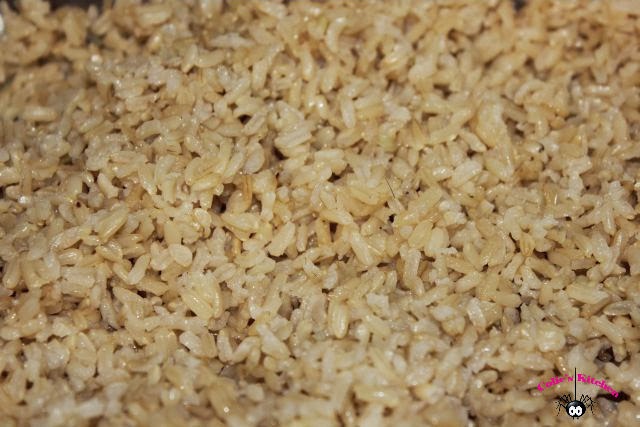
  • Cooked rice, for serving

Directions:

  1. In a small bowl, whisk together brown sugar, soy sauce, sesame oil, red pepper flakes and ginger.
  2. Heat vegetable oil in a large skillet over medium high heat. 
  3. Add garlic and cook, stirring constantly, until fragrant, about 1 minute. 
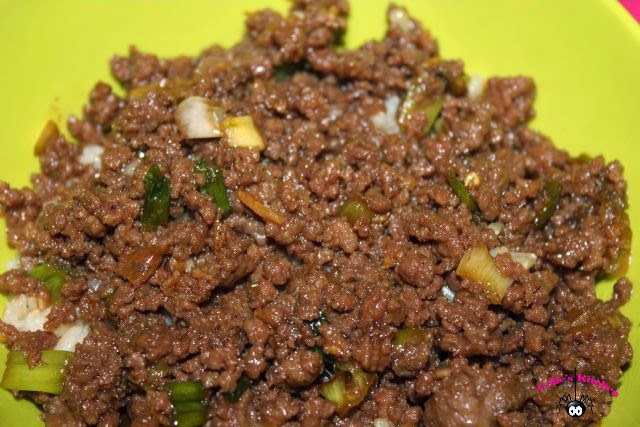
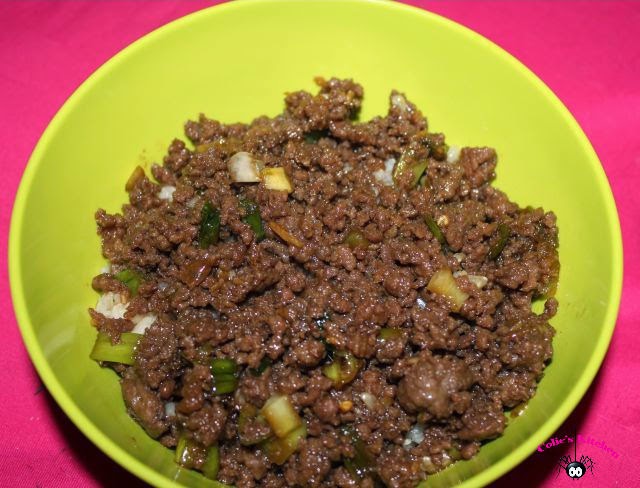
  4. Add ground beef and cook until browned, about 3-5 minutes, making sure to crumble the beef as it cooks; drain excess fat. 
  5. Stir in soy sauce mixture and green onions until well combined, allowing to simmer until heated through, about 2 minutes.

Original Recipe Source

var pfHeaderImgUrl = ”;var pfHeaderTagline = ”;var pfdisableClickToDel = 0;var pfHideImages = 0;var pfDisablePDF = 0;var pfDisableEmail = 0;var pfDisablePrint = 0;var pfCustomCSS = ”;var pfBtVersion=’1′;(function(){var js, pf;pf = document.createElement(‘script’);pf.type = ‘text/javascript’;if(‘https:’ == document.location.protocol){js=’https://pf-cdn.printfriendly.com/ssl/main.js’}else{js=’http://cdn.printfriendly.com/printfriendly.js’}pf.src=js;document.getElementsByTagName(‘head’)[0].appendChild(pf)})();Print Friendly and PDF
Check Out Our Online Recipe Book: www.CafeChatterbox.com

Recipes

To Eat the Egg or to NOT Eat the Egg… That is the Question!


If you are like us egg are either feast or famine in your house. We either go through them like water or they expire. Well lately it’s been expiration city. I found eggs for a sweet price at one store and I forgot I had already bought some at another store so then during the “no one’s eating eggs” season I had two dozen eggs that were expired.

I don’t know about you but I hate the idea of wasting food even eggs, and I hate eggs. But a chicken worked really hard to make the egg that are now expired and the money we spent is now wasted too! No one wins!

All of these Eggs were bad! Bummer!

The good news is even if the carton indicated that your eggs are expired they still might be good and maybe good for longer than you think!


Here is a good way to check if your eggs are expired or not.
  1. Fill up a large mixing bowl full of cool water and place a few eggs at a time in the bowl of water. Don’t overcrowd the bowl just a few will do. 
  2. If the eggs rise to the top of the bowl then they need to be thrown away. If the eggs sink they are still good. 
  3. Don’t judge the carton by one egg try them all out because you may have a few that are still good.
Bad Eggs! Bummer!

So how do you know the egg is bad because it rises to the top of the water? The reason the egg rises to the top of the water is because the white of the egg has started to evaporate which is leaving the egg hollow. The lighter the egg the quicker it rises to the top of the water. If the egg rises it needs to be thrown away. If it sinks you still have time, but I wouldn’t wait too long. 


Good Eggs!

Boil the older eggs or even fry them up if you are in a pinch.  Better yet have breakfast for dinner to use up those eggs. It’s an inexpensive meal and it’s a great way to get rid of eggs without them going to waste.

If you are still a little nervous about the egg let your nose be the judge! It probably won’t fail you, but I have found the bowl of water trick to work every time!

var pfHeaderImgUrl = ”;var pfHeaderTagline = ”;var pfdisableClickToDel = 0;var pfHideImages = 0;var pfDisablePDF = 0;var pfDisableEmail = 0;var pfDisablePrint = 0;var pfCustomCSS = ”;var pfBtVersion=’1′;(function(){var js, pf;pf = document.createElement(‘script’);pf.type = ‘text/javascript’;if(‘https:’ == document.location.protocol){js=’https://pf-cdn.printfriendly.com/ssl/main.js’}else{js=’http://cdn.printfriendly.com/printfriendly.js’}pf.src=js;document.getElementsByTagName(‘head’)[0].appendChild(pf)})();Print Friendly and PDF
Check Out Our Online Recipe Book: www.CafeChatterbox.com

Recipes

Painless Homemade Italian Meatballs

Although I don’t use jarred spaghetti sauce very often when I do I like to add meatballs to the pot. I find that the meatballs help the dish go further and often they make the sauce taste better.

I don’t like using jarred sauce because (to me) it’s flavorless, but recently I found a jarred sauce which I think is fantastic and especially when I am short on time.
My new favorite jarred sauce is Bertolli Organic Olive Oil, Basil and Garlic. 

I have purchased the non-organic before and thought it was OK (better than most), but I bought the organic three pack at Sam’s Club and it’s fantastic for a jarred sauce. I had no idea the organic would taste so much better, but then again organic milk taste better than regular so I guess it makes sense.


I realized last night that we were out of pre-made meatballs so I threw these together quickly. Quickly is the keyword here. I had them resting within 3 minutes. These meatballs are fantastic and super easy to put together. I thought we were going to be meatball-less but this recipe saved the day. I just put what we had on hand together and came up with a really great meatball. 


Once I have more time I am going to make some extra and freeze them for subs or future spaghetti. Who needs to pay so much for meatballs that really don’t taste that great and often have that weird meat flavor when you can just make your own for a fraction of the price!

Below I have the recipe designed for either using the meatballs in a sauce right away or baking them in the oven for future use. Whatever makes you happy!!


Ingredients:
  • 1 lb. lean ground beef
  • 1 egg
  • 2 Tbsp. milk
  • 1/4 cup Italian bread crumbs
  • 1/4 cup parmesan cheese
  • 1 tbsp. dry minced onion
  • 2 tsp. Worcestershire sauce
  • 1/2 tsp. garlic powder
  • 1/8 tsp. pepper

Directions:

  1. To a mixing bowl add one egg and whisk until smooth, then to the bowl add milk, dry onion, Worcestershire sauce, garlic powder and pepper. Mix well. 
  2. Next add ground beef to the bowl and mix well. Using wet hand may work best. The ground beef mixture will be overly wet but don’t panic because it will come together. 
  3. To the ground beef mixture add parmesan cheese and Italian bread crumbs and mix well.
  4.  Cover the bowl with Press’n Seal or plastic wrap and allow the meat to rest for 30 minutes or more. 

To a pot of sauce:

  1. After the resting period roll meat into one inch meatballs. 
  2. Add each ball to a pot of heated sauce. 
  3. Once the meatballs are in the sauce do not stir them for 20 minutes so that the meatballs can set (if you stir them before they start firming up they will break to pieces). 
  4. After 20 minutes you can stir them. 
  5. The meatballs should be completely cooked within another 10-15 minutes

To the Oven:

  1. After the resting period roll meat into one inch meatballs. 
  2. Preheat oven to form into meatballs and place on a pan. 
  3. Bake at 350 degrees for 25-30 minutes until meatballs are no longer pink in center. 
  4. You can turn them after 15 minutes. 
  5. All to cool and freeze or use in some other fashion. 
Print Friendly and PDF

Check Out Our Online Recipe Book: www.CafeChatterbox.com

Recipes

Tasty Vegetarian Taco Salad

I have been looking for more ways to incorporate meatless meals into our menu. We are certainly carnivores but sadly I know we need to cut back on our meat consumption. I was looking around a great blog called the Garden Grazer and I must admit I found some recipe that are delicious looking and meatless too.


One in particular caught my eye which was a vegetarian taco salad with a chipotle cream sauce that dresses the taco salad. I knew this was a must try for me.
This recipe turned our fantastic! Even the doubters in my house were scarfing it down! I thought it was awesome and to tell you the truth there really isn’t much to the whole thing and you can truly do what makes you happy when it comes to the taco salad.


Ingredients:
  • Spanish rice (or brown rice if desired)
  • 1 can whole corn (drained)
  • 1 can black beans (drained and rinsed)
  • 1 cup cheddar cheese
  • 1 can green chilies
  • Lettuce
  • Tomato
  • Black olives

Ingredient for Creamy Chipotle Sauce:

  • ½ cup plain yogurt
  • ½ cup of mayonnaise
  • 1 chipotle pepper in adobo sauce
  • 2 cloves of garlic
  • 1-1/2 teaspoons of adobo sauce (more or less depending on the heat
  • 1 beef bouillon cube
  • 1 tbsp. lime juice
  • ½ tbsp. cumin
Directions:
  1. Make up Creamy Chipotle Sauce by simple putting everything in a blender and blending. 
  2. Make your favorite Spanish rice (Check out our favorite) or simply use cooked brown rice and set aside. 
  3. Heat beans, and corn and slice up veggies and set aside.  
  4. To plate your taco salad spread out a scoop of Spanish rice over your plate, then top the rice with beans, and corn. 
  5. Next, top the corn with cheese, green chilies, lettuce, tomato, and black olives. You can be generous with the veggies because they are low in calorie. 
  6. Then top the entire salad with the creamy chipotle sauce. Start with a small amount then add more as desired.

Original Recipe Source

var pfHeaderImgUrl = ”;var pfHeaderTagline = ”;var pfdisableClickToDel = 0;var pfHideImages = 0;var pfDisablePDF = 0;var pfDisableEmail = 0;var pfDisablePrint = 0;var pfCustomCSS = ”;var pfBtVersion=’1′;(function(){var js, pf;pf = document.createElement(‘script’);pf.type = ‘text/javascript’;if(‘https:’ == document.location.protocol){js=’https://pf-cdn.printfriendly.com/ssl/main.js’}else{js=’http://cdn.printfriendly.com/printfriendly.js’}pf.src=js;document.getElementsByTagName(‘head’)[0].appendChild(pf)})();Print Friendly and PDF
Check Out Our Online Recipe Book: www.CafeChatterbox.com

Recipes

Perfectly … Perfect Brown Rice!


This recipe is the answer to so many of my brown rice prayers. Normally my brown rice either comes our crunchy, or a big gloppy mess. I have never been able to find a happy middle for my brown rice until now. I found a recipe online that claimed to be the perfect brown rice. I seriously had my doubts. I haven’t found a perfect way to cook brown rice to date so why would I now? Who knew I would this time. 

This recipe turned out awesome!! I love anything that I can cook ahead and have it ready to go at any time and I love that I can make a large quantity of brown rice at the same time. In order to make a good fried rice you have to have odder cooked rice that has cooled. This is perfect!

If you want step by step directions you should go to where I found this wonderful recipe: www.ourbestbites.comthis recipe is awesome and so are so many others! You could spend forever just looking around.


Ingredients:
  • 1 -1/2 cups brown rice
  • 2-1/3 cups water
  • 2 teaspoons unsalted butter or vegetable oil
  • 1/2 teaspoon salt

Directions:

  1. Adjust oven rack to middle position.  Preheat oven to 375 degrees. 
  2. Spread rice in an 8-inch square baking dish.
  3. Bring water and butter or oil to a boil, either in a saucepan or in the microwave.  Keep an eye on it and take it off heat immediately after it starts boiling.  
  4. Immediately stir in salt and pour water over rice in baking dish.  Cover baking dish tightly with 2 layers of foil, or heavy-duty foil.  
  5. Transfer baking dish to oven and bake rice until tender, about 1 hour.
  6. Remove baking dish from oven and uncover.  
  7. Fluff rice with fork, then cover dish with kitchen towel and let rice stand for 5 minutes.  
  8. Uncover and let rice stand 5 minutes longer.  Serve immediately.

Print Friendly and PDF
Check Out Our Online Recipe Book: www.CafeChatterbox.com