Recipes

Brussels Sprouts & Cauliflower Gratin

I really loved this recipe! My only beef with it is that you can’t really taste the cauliflower because the Brussels sprouts really over power the dish. If you don’t like sprouts you will NOT like this recipe. I happen to love sprouts, but even when we were finishing up the left overs a few days later I thought the sprouts were a little stronger than I like. The bacon takes the cake in this recipe and just makes it into something really special. 

I think you could do so much with the concept of this recipe by changing out the vegetables. I think potatoes and carrots would rock in this sauce!


Ingredients:
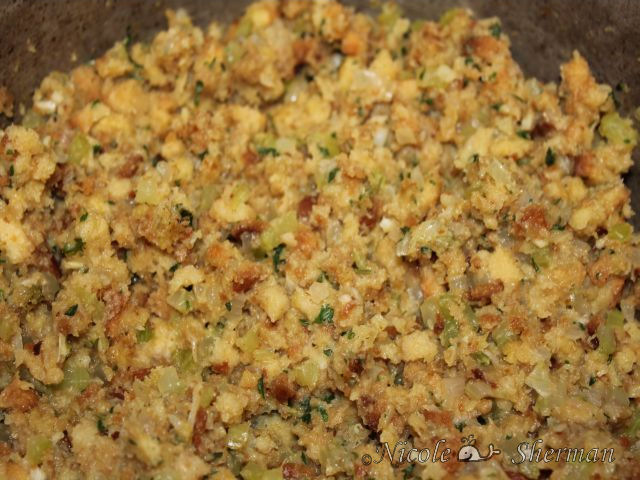
  • 2 cups fresh cauliflower florets
  • 2 cups fresh brussels sprouts, quartered
  • 2 bacon strips, chopped
  • 1/2 large sweet onion, chopped
  • 2 garlic cloves, minced
  • 1/8 cup all-purpose flour
  • 3/4 cup milk
  • 1/3 cup half-and-half cream
  • 1/2 teaspoon salt
  • 1/4 teaspoon pepper

Directions:
  1. Place cauliflower and brussels sprouts in a large saucepan and cover with water. Bring to a boil. Cover and cook for 2-3 minutes or until crisp-tender; drain.
  2. Meanwhile, in a large skillet, cook bacon over medium heat until crisp. Remove to paper towels with a slotted spoon; drain, reserving drippings. Sauté onion and garlic in drippings until tender. Stir in flour until blended; gradually add the milk, cream, salt and pepper. Bring to a boil; cook and stir for 2 minutes or until thickened.
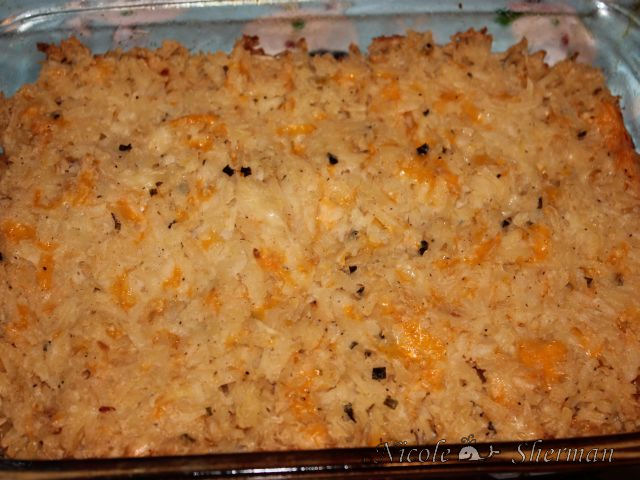
  3. Stir in cauliflower mixture and bacon. Transfer to a greased 2-1/2-qt. baking dish. Cover and bake at 375° for 15 minutes.
  4. Uncover and bake, uncovered, for 15-20 minutes. Yield: 8 servings.

Original Source

Check Out Our Online Recipe Book: www.CafeChatterbox.com

Recipes

Cheater… Cheater… Stuffing!

I absolutely loved this recipe!  It’s simple fantastic! Don’t get me wrong it’s nothing fancy, but that’s what I like about it. I already like Stovetop Stuffing, but this takes Stovetop and fancy’s it up!  After it was made no one had a clue that the majority of the recipe came out of a box! Frugal, easy, and fantastic… what more could you ask for?

Ingredients:
  • 1 medium onions, minced
  • 2 -3 stalks celery, chopped fine
  • 2 tablespoons butter
  • 1/4 teaspoon poultry seasoning
  • 1-2 cups chicken broth (or any broth)
  • Hot water
  • 1 (6 ounce) packages Stove Top-style stuffing mix

Directions:

  1. Sauté onions and celery in butter.
  2. Sprinkle with poultry seasoning.
  3. Set aside to cool slightly.
  4. Toss this mixture into your favorite dry stuffing mix.
  5. Heat broth and set aside.
  6. Read directions on your favorite stuffing mix box.
  7. Add enough hot water to the broth to make up the required liquid needed.
  8. (Omit butter the recipe calls for as it was already used to sauté vegetables.)
  9. Pour over stuffing/vegetables mixture and mix well.
  10. Stuff your chicken or turkey. For a side dish place stuffing in a baking dish; cover and bake for 15 to 25 minutes at 325 degrees Fahrenheit.

Original Source

Check Out Our Online Recipe Book: www.CafeChatterbox.com

Recipes

Chive & Onion Hash Brown Potatoes

This is a really great side dish! It’s very easy to put together and bakes up nicely. The flavor is wonderful. In truth you could use any of the flavored cream cheese. I think the vegetable flavored or garlic flavored would be fantastic also. 


Ingredients:
  • 3/4 cup half-and-half cream
  • 1/2 cup spreadable chive and onion cream cheese
  • 1 tablespoons dried minced onion
  • 1/2 teaspoon salt
  • 1/4 teaspoon pepper
  • 1 packages (20 ounces each) refrigerated shredded hash brown potatoes
  • 1 cups shredded Swiss cheese
  • 1 1/2 tablespoons minced fresh chives, divided
  • 1 tablespoons butter, cubed

Directions:
  1. In a small saucepan, combine the first five ingredients. Cook and stir over medium heat until blended; transfer to a large bowl. Add potatoes; mix well.
  2. In a greased 13-in. x 9-in. or 3-qt. baking dish, layer a third of the hash brown mixture and a third of the cheese; sprinkle with 1 tablespoon chives. Repeat layers. Top with remaining hash brown mixture and cheese; dot with butter.
  3. Cover and bake at 375° for 35 minutes. Uncover; bake 10-20 minutes longer or until edges begin to brown. Let stand for 10 minutes before cutting. Sprinkle with remaining chives. 

Yield: 12 servings.
Original Source

Check Out Our Online Recipe Book: www.CafeChatterbox.com

Recipes

Magic Cookie Bars

This is a huge family favorite that we always make a Christmas time and here and there throughout the year. I LOVE them! Have you seen the Chocolate Chip Paradise Pie at Chili’s? Yep that’s magic cookie bars with ice cream on top! Yummo How about making Chocolate Chip Paradise Pie for the fraction of the price? This is a super simple recipe that anyone can make regardless of your cooking level! Give it a try and see what you think? If you are feeling extra naughty slap on some vanilla ice cream, caramel sauce, and chocolate sauce onto your bars for paradise pie!

Ingredients:

  • 1/2 cup butter or margarine, melted
  • 1 1/2 cups graham cracker crumbs
  • 1 (14 ounce) can EAGLE BRAND® Sweetened Condensed Milk
  • 2 cups semisweet chocolate morsels
  • 1 1/3 cups flaked coconut
  • 1 cup chopped nuts
Directions:

  1. Heat oven to 350 degrees F (325 degrees for glass dish). Coat 13×9-inch baking pan with no-stick cooking spray.
  2. Combine graham cracker crumbs and butter. Press into bottom of prepared pan. Pour sweetened condensed milk evenly over crumb mixture. Layer evenly with chocolate chips, coconut and nuts. Press down firmly with a fork.
  3. Bake 25 minutes or until lightly browned. Cool. Cut into bars or diamonds. Store covered at room temperature.

Recipe Source

Chocolate Chip Paradise Pie at Chili’s From the Chili’s Website


Check Out Our Online Recipe Book: www.CafeChatterbox.com

Recipes

Homemade Foaming Hand Soap


I don’t like to refer to myself as cheap so I will say I am frugal. I hate spending big bucks on things we use every day.  I love to have foaming hand soap in the bathroom, but I hate to pay refill prices. In the kitchen I have the Lysol No-Touch Hand Soap System which I refill myself also. I decided to find a way to refill my foaming hand soap dispenser that I purchased at Target. I paid around $2.50 for the initial foaming soap dispenser and of course it came filled, but I wasn’t going to pay the money they wanted to refill it. After 2 minutes of research I found a “recipe” and instructions on how to make my own. I walked to the bathroom with a measuring spoon, cup, and dish soap and 1 minute later I had foaming soap! Simple Simple Simple! Cheap! If you want something that smells better than dish soup you can use Bath and Body Works Shower Gel or even the Body Shop Shower Gel. Whatever makes you happy! I made pumpkin spice soap today using the Body Shop Shower Gel. 

You will need:
  • 1 empty foaming hand spa dispenser
  • 3 TBS Clear (very important) liquid soap (body wash, hand soap, dish washing soap, shampoo)
  • 2/3 Cup water
Directions:
1.      Add the 3 TBS of clear liquid soap to your foaming hand soap dispenser
2.     Add the 2/3 Cup of water
3.     Close up your your foaming hand soap dispenser and gently move the soap and water around so that they will mix well. Do not shake! Gently combine the water and the soap.
4.     Test your foaming hand soap dispenser to insure it works
5.     Enjoy!

    Check Out Our Online Recipe Book: www.CafeChatterbox.com