Recipes

Avocado Orange Salad Dressing


I was looking for a salad dressing that involved fresh ingredients and no oils or vinegars. This salad dressing hit the spot. It’s actually not too sweet but has a nice orange and avocado flavor. It’s smooth and silk and it’s super easy to make. I really like this salad dressing. It’s great on just about any kind of salad and low in calories too you can’t beat that!!

Ingredients:
  • 6 ounces Fresh Avocado
  • 10 ounces Fresh Squeezed Orange Juice (don’t use anything other than fresh or it will be too sweet)
  • 1 teaspoon garlic powder
  • 1 teaspoon onion powder


Directions:
Add all the ingredients to a blender and blend until smooth if it’s too thick add more orange juice to thin.


Check Out Our Online Recipe Book: www.CafeChatterbox.com

Recipes

Stir Fry Sauce

I purchased a bag of stir fry veggies that claimed to already have the sauce in the bag of course just my luck as I start to make dinner I realized the packs of sauce are missing from the bag! Ugh! A meal that was purchased to be quick and easy didn’t turn out to be so quick and easy. At the last minute I was scrambling for a stir fry sauce recipe.

I came across this recipe and I am sure happy I did. Not only did it come together quick and easy but it’s really tasty too. The only thing I would change the next time I made this sauce is to use about half the suggested amount of sugar. Don’t get me wrong it was still good I would just prefer it to be a little less sweet. This makes enough for 4-5lbs of vegetables.


Ingredients:
  • 2/3 cup soy sauce
  • 1/2 cup chicken broth
  • 1/3 cup rice wine
  • 3 1/2 tablespoons sugar
  • 1 tablespoon sesame oil
  • 1/4 teaspoon white pepper
  • 2 tablespoons cooking oil
  • 1 tablespoon minced garlic
  • 1 tablespoon minced ginger
  • 2 tablespoons cornstarch
  • 1/4 cup water

Directions:

  1. In a bowl, combine soy sauce, broth, rice wine, sugar, sesame oil and white pepper.
  2. Dissolve the cornstarch in 1/4 cup water.
  3. Heat a pan over high heat; add the cooking oil, swirling to coat; add the garlic and ginger; cook, stirring, until fragrant, about 15 seconds.
  4. Add the soy sauce mixture; bring to a boil.
  5. Reduce heat to medium and cook for 1 minute.
  6. Add the cornstarch solution and cook, stirring, until the sauce boils and thickens.

Original Recipe Source

Check Out Our Online Recipe Book: www.CafeChatterbox.com

Recipes

Creamy Chicken and Rice Soup


This is really an exceptional recipe. I love how easy it is to make, and better yet it’s bursting with flavor. It’s one of those bowls of soup that you can keep eating until you pop. The carrots take a nice role in this soup not only visually for the color affect but they seem to meld well with everything else in the bowl. I noticed they gave the soup a nice earthy flavor.

I had this entire pot of soup on the stove cooking in about 30 minutes which is great considering all of the distractions around me. As weird as is sounds I never think soup is going to be very flavorful unless it’s a lot of work and it takes a long time cooking on the stove. Personally I prefer chowders or stews, but I really loved this soup!

Ingredients: 
  • 1 tsp. of olive oil
  • 1/2 sweet yellow onion
  • 3 carrots, diced
  • 3 stalks of celery, diced
  • 2 cloves of garlic, minced
  • 5 cups of chicken stock
  • 1 tsp. chicken bouillon (Try to use MSG free)
  • 1/2 tsp. dried basil
  • Sea salt and freshly cracked pepper to taste
  • 1 bay leaf
  • 1 cup cooked chicken breast, diced
  • 1/2 cup brown rice
  • 1/2 cup of frozen sweet yellow corn
  • 2 tbsp. corn starch
  • 2 cups milk

Directions:

  1. Heat olive oil in a large Dutch oven over medium heat. Add the onion, carrots and celery once hot. Cook until tender, stirring occasionally, about 5 minutes. 
  2. Add the minced garlic and stir constantly for 60 seconds. 
  3. Add the chicken stock, diced chicken, rice, bouillon, basil, sea salt, black pepper and bay leaf. Cover and cook over medium heat for 15-20 minutes. 
  4. Turn the soup up until it boils. Mix the corn starch and milk thoroughly in a bowl. Add the milk mixture to the boiling soup and stir. 
  5. Lower the heat and add the corn. Mix thoroughly and simmer for a few more minutes or until the rice and vegetables are tender. Remove bay leaf and discard.

Original Recipe Source

Check Out Our Online Recipe Book: www.CafeChatterbox.com

Recipes

Moist Roasted Turkey ….. Turkey Perfection!


After Christmas I found a great deal on turkey’s … .10 cents per pound. I got a 20 pound turkey for $2. I knew I couldn’t pass up that deal. I decided to look for a new turkey roasting recipe when I came upon this one.

I must admit this was the best turkey we had ever had. I think the key is to start cooking the turkey with broth already in the roaster. It really helped to steam the turkey. Not only was it full of flavor but it was almost incredibly moist. I don’t think I have ever eaten a turkey so moist.

I will be honest you when I say I am not a big turkey fan, but this turkey was exceptional! I have never had one better!

Ingredients:
  •  1 (18-20 pound) whole turkey
  •  1/2 cup unsalted butter, softened
  •  Salt and freshly ground black pepper to taste
  •  1 1/2 quarts turkey or chicken stock 

Directions:
  1. Preheat oven to 325 degrees F (165 degrees C). Place rack in the lowest position of the oven.
  2. Remove the turkey neck and giblets, rinse the turkey, and pat dry with paper towels. Place the turkey, breast side up, on a rack in the roasting pan. Rub the skin with the softened butter, and season with salt and pepper. Position an aluminum foil tent over the turkey.
  3. Place turkey in the oven, and pour 2 cups turkey or chicken stock into the bottom of the roasting pan. Baste all over every 30 minutes with the juices on the bottom of the pan. Whenever the drippings evaporate, add stock to moisten them, about 1 to 2 cups at a time. Remove aluminum foil after 2 1/2 hours. Roast until a meat thermometer inserted in the meaty part of the thigh reads 180 degrees F (80 degrees C), about 4 hours.
  4. Transfer the turkey to a large serving platter, and let it stand for at least 20 to 30 minutes before carving.

Original Recipe Source

Check Out Our Online Recipe Book: www.CafeChatterbox.com

Recipes

Tortillini and Cheese


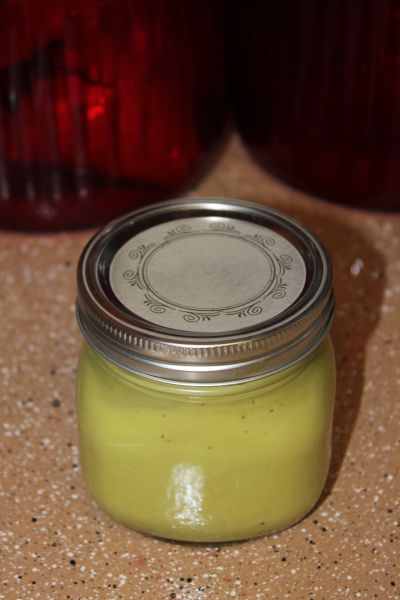
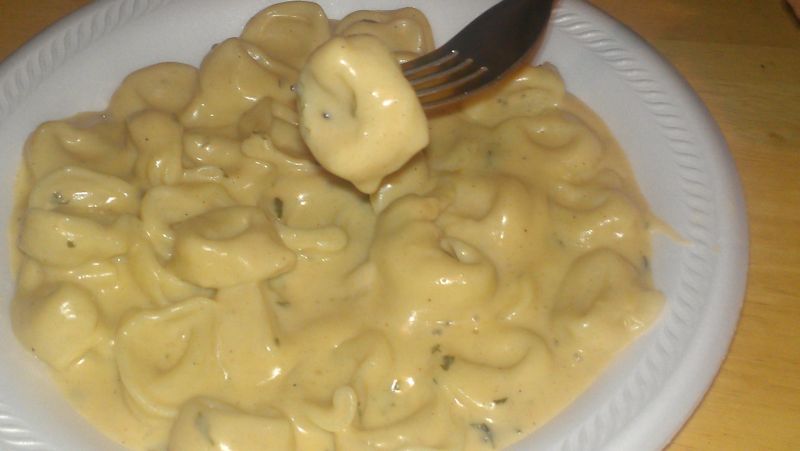
Taken with my Smartphone… Not the best Pic!

My husband and I came home from long day of looking for a freezer. Neither one of us were in the mood for anything from a drive through nor we both felt too tired to deal with going to a restaurant. We were both craving Italian food, but without having to go out.

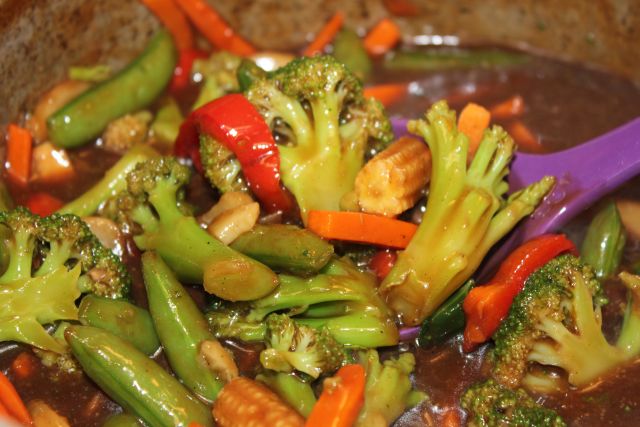
I remember that I had a bag of frozen tortellini in the freezer awaiting our arrival, but no sauce. I decided to make a simple cheddar cheese sauce then kick it up with a few spices. The tortellini turned out fantastic. It made me realize once again that there is no need to buy things in jar and cans when something quick, easy and homemade taste so much better! This sauce would be great on just about anything… like steamed veggies.

Ingredients:
  • 2 pounds of dry or frozen tortellini (cooked according to the packaging)
  • 2 cups milk
  • 1 cup cheddar cheese
  • ¼ cup butter
  • ¼ cup flour
  • ½ teaspoon salt
  • 1/8 teaspoon paprika
  • 1/8 teaspoon pepper
  • 1/8 teaspoon garlic powder
  • 1/8 teaspoon of onion powder
  • ½ teaspoon dried parsley

Directions:
*Note: I find when making a cheese sauce that having everything measured out and ready to add to your pot immediately is the key to making sure this turns out correctly. You need to have everything ready to go when you need it. You won’t necessarily having time to start measuring or you might end up with more lumps in your cheese sauce than sauce.*
  1. Place your burner on medium and begin to melt the butter in saucepan, and gradually start adding flour using a whisk to mix everything together. Be patient and go slow with this process.
  2. When your flour butter combination starts getting thick slowly start adding milk and whisking at the same time. Stay patient! If it starts lumping up don’t panic just keep whisking it should start coming together. Go slowly while adding the milk
  3. As it starts to thicken up keep whisking and add the spices while doing so. DO NOT allow your cheese sauce to come to a boil at any point because once you add your cheese the oils in the cheese and the milk will start separating you don’t want that or the recipe will be ruined.
  4. Stir in the cheddar cheese and continue mixing with the whisk. Heat until cheese melts and sauce the sauce becomes a smooth consistency. **if you find your cheese sauce to be lumpy you can slowly pour it into a blender and run it for a few seconds. This will remove all of your lumps. If you don’t have a glass blender you will need your cheese sauce to cool a bit before pouring it in the plastic blender.**
  5. Add tortellini to the cheese sauce and heat through.

Check Out Our Online Recipe Book: www.CafeChatterbox.com