Recipes

Roasted Garlic Compound Butter


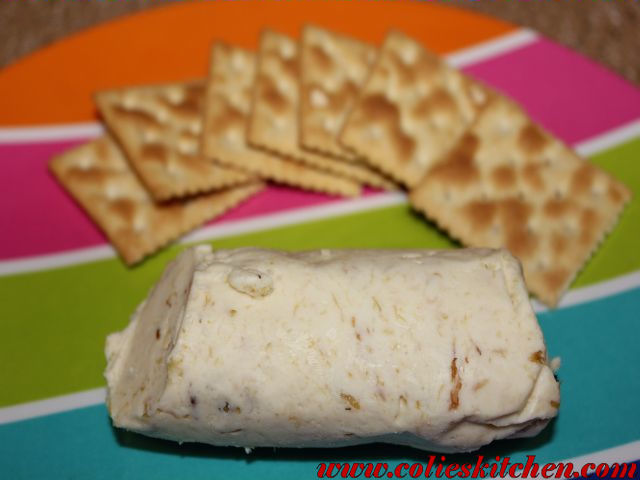
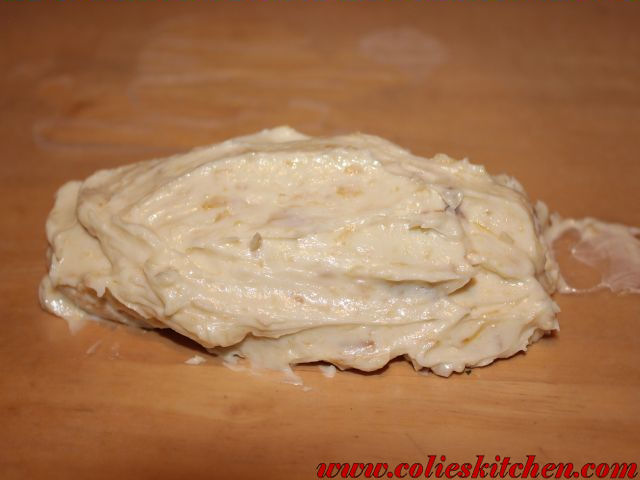
I love to keep compound better in the refrigerator. It comes in handy when I make garlic bread or toasted or when I want a few crackers as snack. It keeps for a few months so it’s something you can keep on hand.

What’s great about compound butter is you can make it any way you want it. If you like chives, onion, green onion, thyme, basil, or whatever you can add it to your butter.  I have found that the longer the butter sets the better it will taste.  

If you have ever purchased pre-made compound butter at a specialty store or a deli you know how expensive it is. You are simply paying for the convenience of someone else making it. Make it yourself, customize it the way you like it, and save a lot of money. The big bonus is you know what’s in it!


Ingredients:

  • Roasted Garlic Compound Butter
  • 1 stick salted butter (softened)
  • 1 bulb of garlic
  • *any other spices that you want to add*

Directions for Roasting the Garlic:

  1. Preheat the oven to 400°F.
  2. Peel away the outer layers of the garlic bulb skin, leaving the skins of the individual cloves intact. Using a knife, cut off 1/4 to a 1/2 inch of the top of cloves, exposing the individual cloves of garlic.
  3. Place the garlic heads in a piece of foil. Drizzle a couple teaspoons of olive oil over each head, using your fingers to make sure the garlic head is well coated. Cover with aluminum foil.
  4. Bake at 400°F for 30-35 minutes, or until the cloves feel soft when pressed.
  5. Allow the garlic to cool enough so you can touch it without burning yourself.
  6. Use a small knife cut the skin slightly around each clove. Use a fork or your fingers to pull or squeeze the roasted garlic cloves out of their skins. 


Compound butter directions:

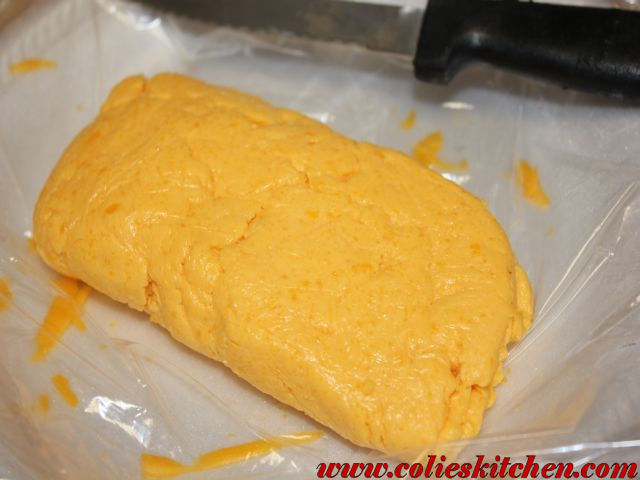
  1. Once your garlic has completely cool add it to the room temperature butter and make sure it is mixed well. 
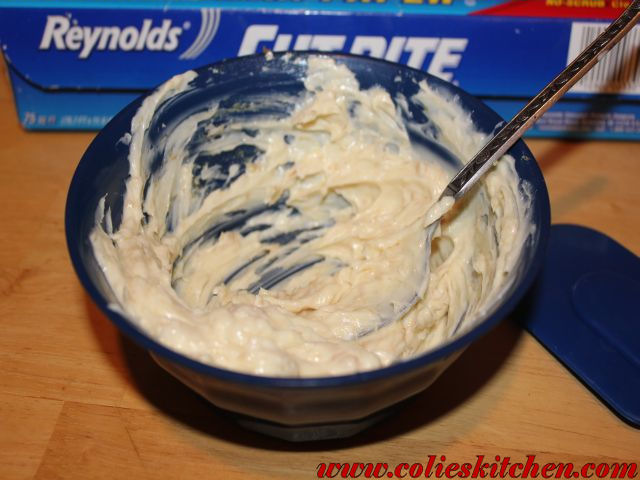
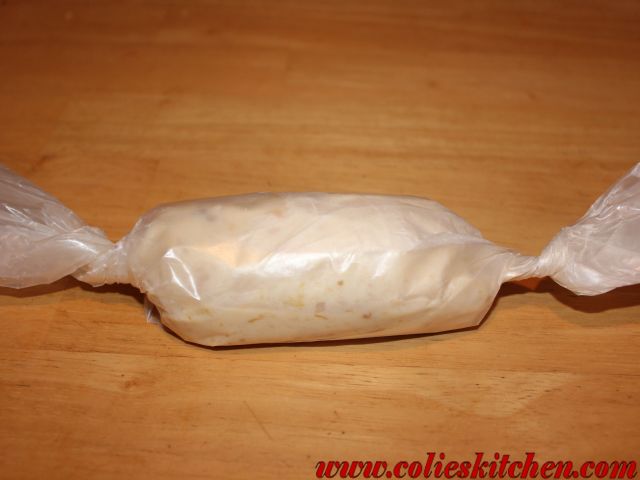
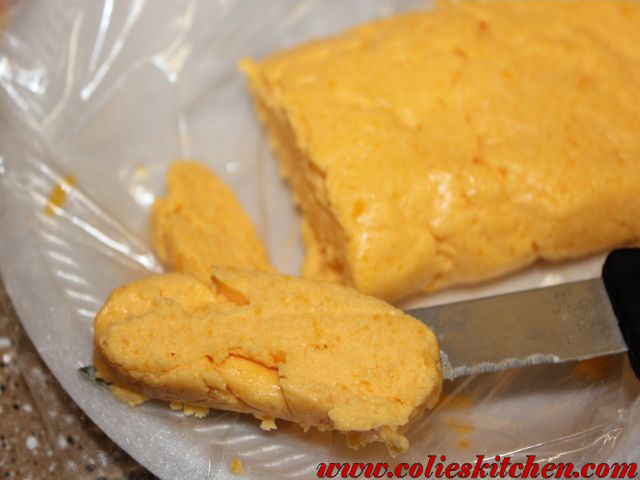
  2. Once everything is mixed well together scoop the butter onto a piece of wax paper and form the butter into a stick or into the shape that makes you happy. 
  3. Place in a freezer for 30 minutes to set the butter, then refrigerator after and use as needed. 


Check Out Our Online Recipe Book: www.CafeChatterbox.com

Recipes

Homemade Mayonnaise (Anne Burrell)

This recipe is modified for many good reasons. I took the reviews of this recipe and modified it based on what other people had to say. This is an amazing version of mayo. The flavor is better than anything you will get in a jar. You can do so many things with the recipe adding and changing here and there based on your preferences. I suggest just using this as a suggestion and adding the things you love to your own mayo.

I will give you a tip and it’s a critical tip, take it from me because this was my third try at making this recipe. The first two were a flop. The key to making mayo is adding the oil extremely slow. When I say extremely slow I am meaning ¼ of a teaspoon at a time, then mix and add and mix and so on. If you add the oil too fast your mayo will not come together and you will have wasted time and ingredients. Be patient! You will need them. Once again go slowly with the oil it’s KEY!

Ingredients:
  • 2 egg yolks
  • 1/8 cup red wine vinegar
  • 1 tablespoon Dijon mustard
  • 1 teaspoon garlic powder
  • Kosher salt
  • 1 cup vegetable oil
  • 1 tablespoon olive oil
  • 1 tablespoon sugar

Directions:
  1. Place the egg yolks in the bowl of the food processor and add the vinegar and mustard. 
  2. Season with salt, to taste. 
  3. Turn the machine on and VERY slowly start to drizzle in the oil. Drip, drip, drip until the mixture starts to look like mayonnaise, then a slow steady stream of oil can be added.

Original Recipe Source

Check Out Our Online Recipe Book: www.CafeChatterbox.com

Recipes

Homemade American Cheese ("Like" Velveeta)


This recipe really came in handy Thanksgiving afternoon. I realized about 2:30pm I forgot to buy Velveeta cheese for a casserole I was making to have with dinner. ALL of the grocery stores by my house closed at 2:00pm. I am always late!

I had wanted to try this recipe so the timing of finding this recipe was perfect. I had it saved waiting for the right moment. Who knew? I quickly and I mean quickly made this recipe up. I wasn’t concerned about refrigerating it because it was going to be melted in a casserole anyway, but it was imperative that it get done was.

Who knew it would be so easy to make your own American cheese? After making this up myself I don’t know that I will ever buy the pre-made/processed cheese again.  In cost alone this is worth making.

My American cheese loaf turned out fantastic!! Not only did it taste wonder (better than the name brand) but the texture was the same, the melting texture was the same, and it formed into a nice loaf too. I didn’t even have to refrigerate it for it to get hard. It was so fun and so ridiculously easy that it’s crazy!! I swear after I grated the cheese everything was done within minutes.

This recipe calls for whole milk powder, but I used the regular fat free powdered milk and had no problems with it. I didn’t see that it made a difference.


Ingredients:
  • 1 tablespoon water
  • 1½ teaspoons powdered gelatin
  • 12 ounces Colby cheese, shredded
  • 1 tablespoon whole milk powder
  • 1 teaspoon salt
  • ⅛ teaspoon cream of tartar
  • ½ cup plus 2 tablespoons whole milk

Directions:
  1. Line 5-by 4-inch disposable aluminum loaf pan with plastic wrap, allowing excess to hang over sides. 
  2. Place water in small bowl, sprinkle gelatin over top and let mixture sit for 5 minutes. Pulse cheese, milk powder, salt, and cream of tartar in food processor until combined, about 3 pulses.
  3. Meanwhile, bring milk to boil in small saucepan. Off heat, stir in softened gelatin until dissolved, and transfer mixture to 1-cup liquid measuring cup. With processor running, slowly add hot milk mixture to cheese mixture until smooth, about 1 minute, scraping down bowl as needed. 
  4. Immediately transfer cheese mixture to prepared pan, pressing to compact. Wrap tightly and chill at least 3 hours, or overnight.

Original Recipe Source


Check Out Our Online Recipe Book: www.CafeChatterbox.com

Recipes

Dump Brownies (Make Now … Cook Later)


In an effort to cut out as many pre-made boxed items I can from our diets I have been trying to find things that I can make ahead of time that will be just as easy to use when I need them.  I love boxed items because they are easy I just don’t like all the additives that can be found in the boxes.

This is a super easy recipe that can be stored in a zip bag and used when you need it.  (To me) they taste identical to Betty Crocker brownies! I like to call them dump brownies because you can dump everything in a bag, and then when you need them they are basically ready to go just add the wet ingredients.

Another great thing about these brownies is it’s something you can throw together when company is coming over. With the holiday approaching you may have guest stopping by and it’s nice to have something warm in the oven to serve them. Plus your home will smell wonderful when they walk in the door.  

These brownies are also customizable! You can add marshmallows, chocolate chips, peanut butter chips, caramels, and so on to these brownies. Yumm-O!

I do not know who to give credit to when it comes to these brownies so if I owe you credit please let me know. I found them by clicking on a dead Pinterest link.

Dry Ingredients (For the make-ahead bag)
  • 1 Cup Sugar
  • 1/2 Cup Flour
  • 1/3 Cup Cocoa
  • 1/4 tsp. Salt
  • 1/4 tsp. Baking Powder.

Wet Ingredients to add later
  • 2 Eggs,
  • 1/2 Cup Vegetable Oil,
  • 1 teaspoon Vanilla.

Directions:

Bake in an 8×8 pan at 350 degrees for 25-45 minutes. Mine took 45 minutes, but the original recipe states 25 minutes. 

This was after 10 minutes on the table!!


Check Out Our Online Recipe Book: www.CafeChatterbox.com

Recipes

Parisian Green Beans


I love green beans and I am always looking for new ways to make green beans. Sometimes you just get tired of the same plain Jane recipe. I remember a recipe my dad made called Parisian green beans. I have no idea why they were called Parisian other than the wine in them, but I do remember them tasting amazing so I thought I would try making them myself. I am sure happy I did. They turned out perfect and bursting with flavor. They cook quickly and have a nice end result.

Ingredients:
  • 8 ounces of frozen green beans
  • 1 tablespoon dry onions
  • ¼ cup white wine
  • 1 cup water
  • 1 beef bouillon cube
  • 1 tablespoon unsalted butter
  • Pepper to taste

Directions:
  1. In a skillet add water, beef bouillon, butter, wine, pepper, dry onions, and bring to a boil. Once your mixture begins to boil cover and cook down to half the original amount of liquid.
  2. Once you are at half the liquid add green beans, cover and simmer until the green beans are tender and your liquid thickens. 

Check Out Our Online Recipe Book: www.CafeChatterbox.com